
How to upload an image for all or several sizes of a product?
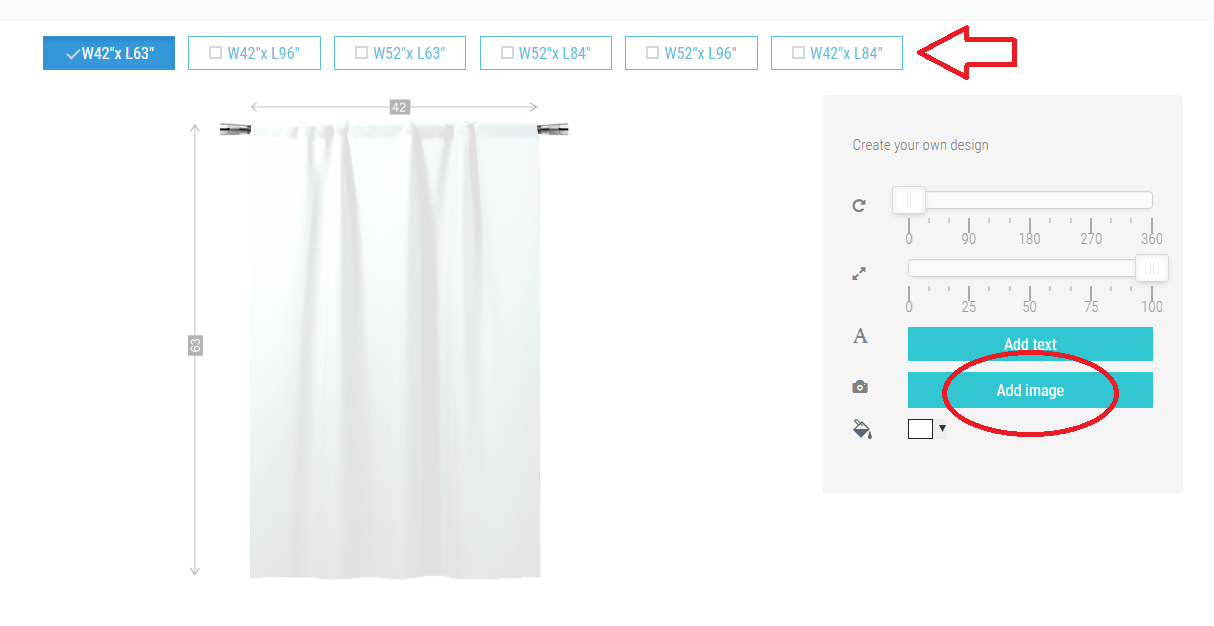
Step 1.
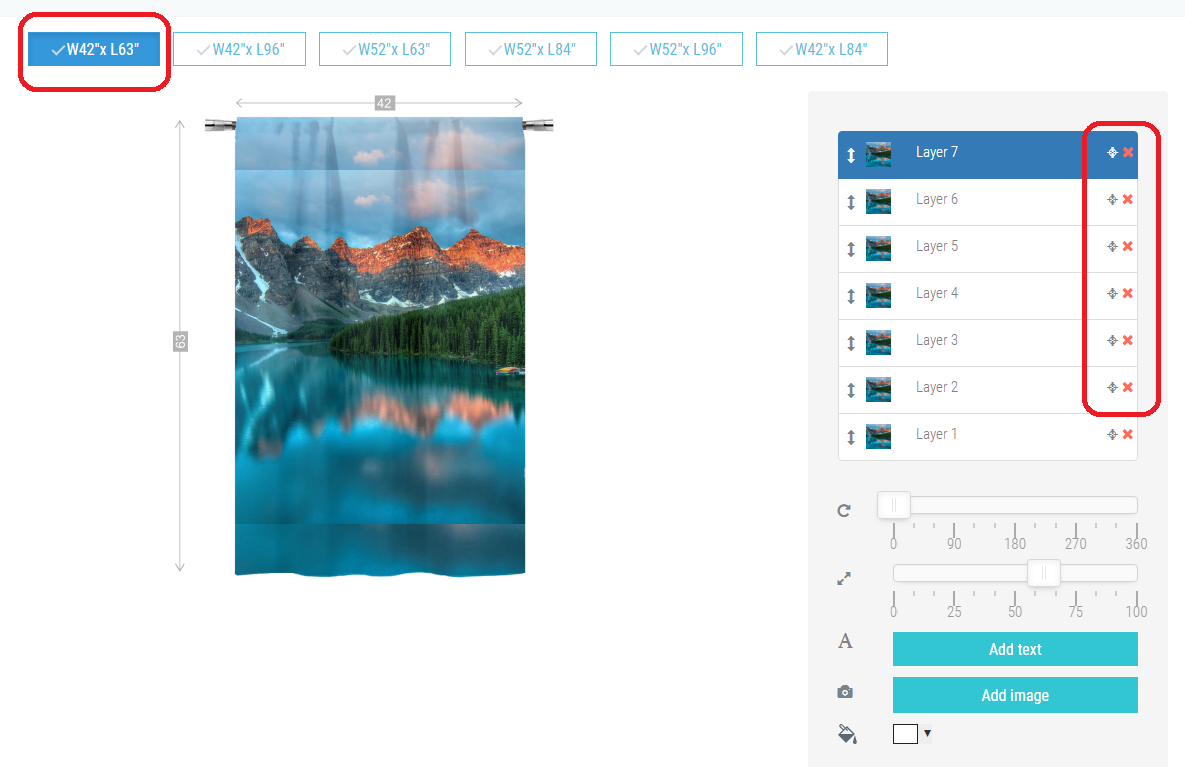
To upload an image for all sizes you need to adjust the image for every size. In order to do this, select the needed size when creating a product and tick the box. Then click on the button “Add image” and choose the required image.
Step 2.
You can change the size with the help of a slider bar or by dragging the corner of the image.
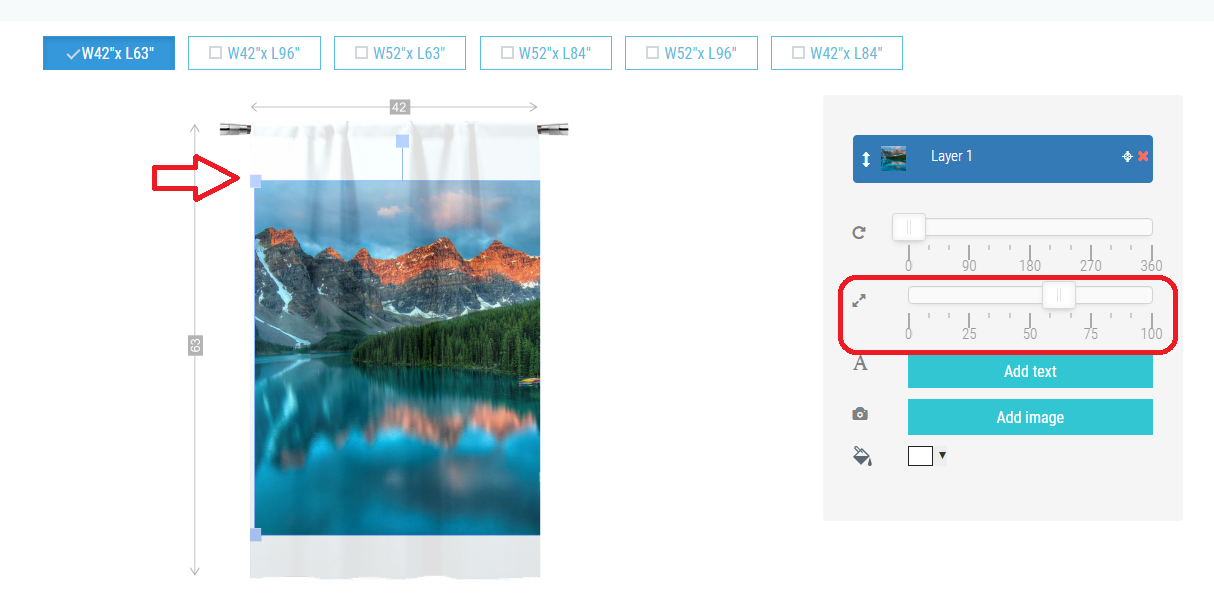
If it doesn’t fit the size of the product, inform yourself about the printing specs or download our zip file. In case there are no printing specs on the product’s page, please contact us at hello@factory4me.com.
Step 3.
You need to do this with all sizes uploading images one by one for each size.
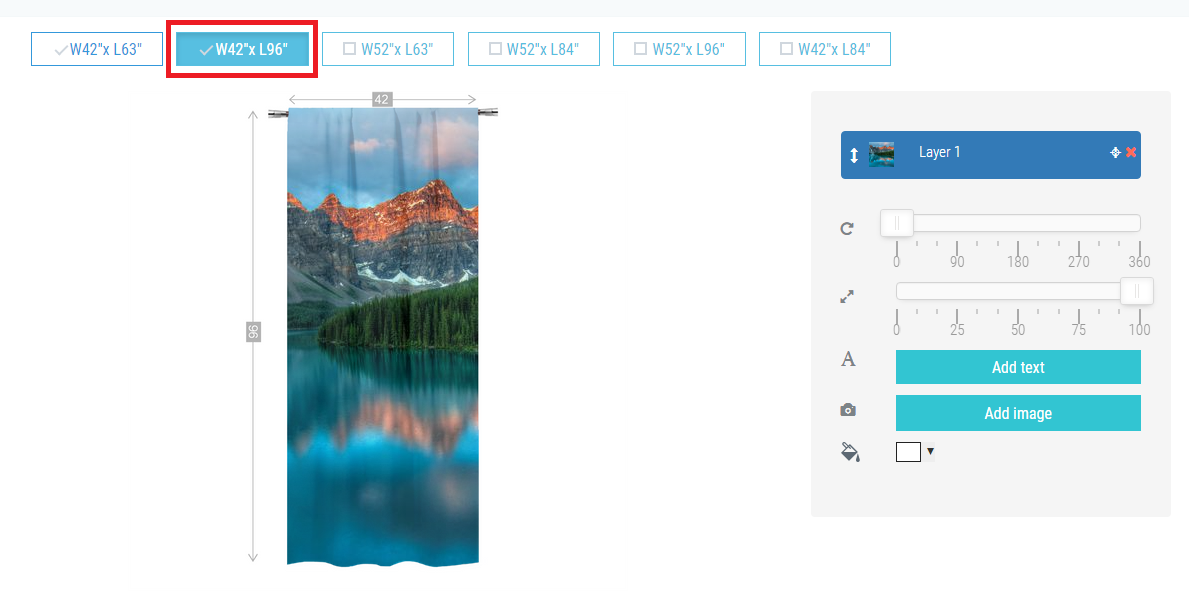
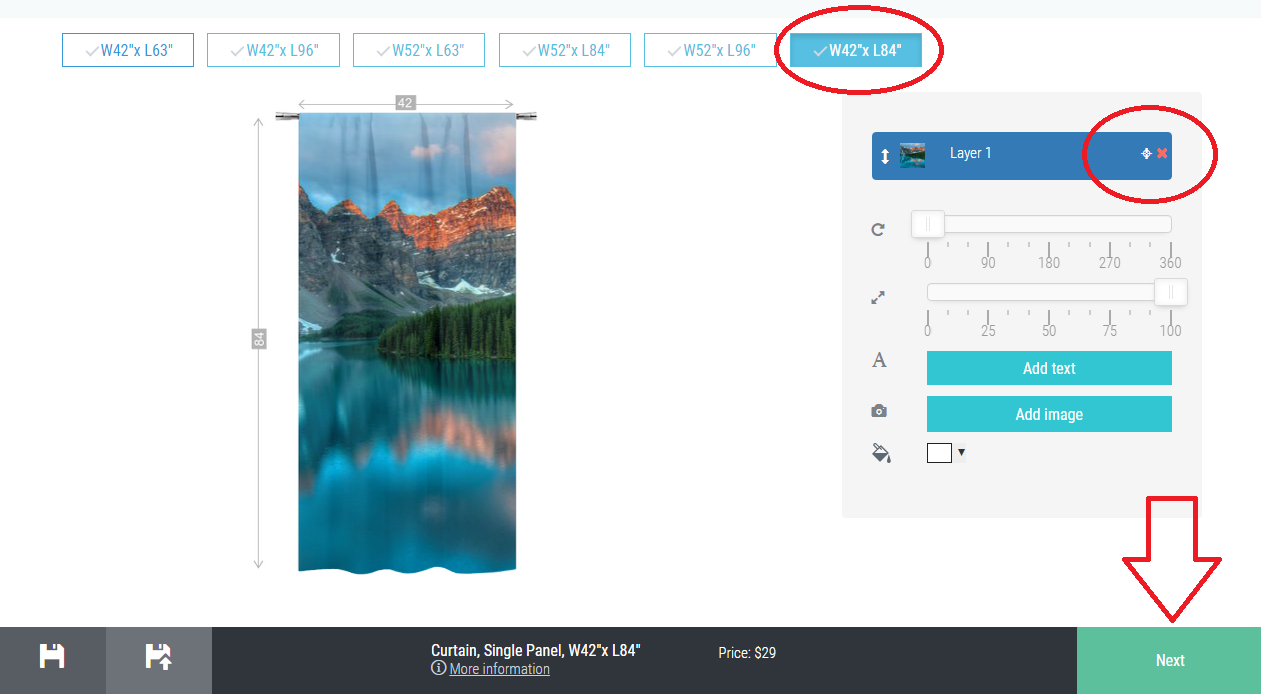
When you are done with it, you need to check if images appeared on other sizes of the product. They may lay one upon the other. In this case, delete them by clicking on the red crosses next to each layer starting from the top one. Remain only layer 1. These layers will not be deleted on products of other sizes.
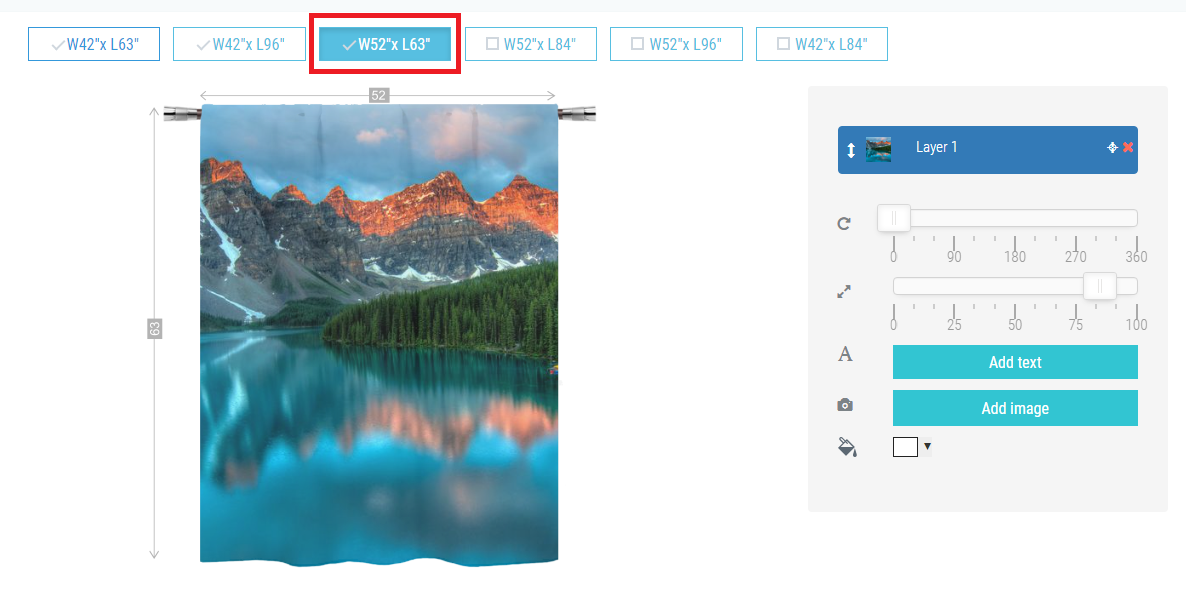
In such a way, one by one, check every size and click on the button “Next”.
After that, you can complete creating your products.